Avviso:
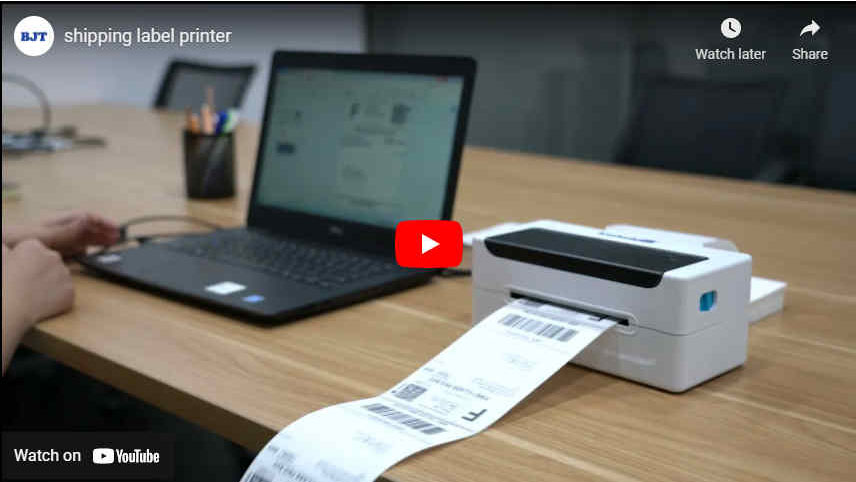
1. La stampante per etichette di spedizione per piccole imprese non supporta wifi o bluetooth. Utilizzare il cavo USB per connettersi con PC o laptop.
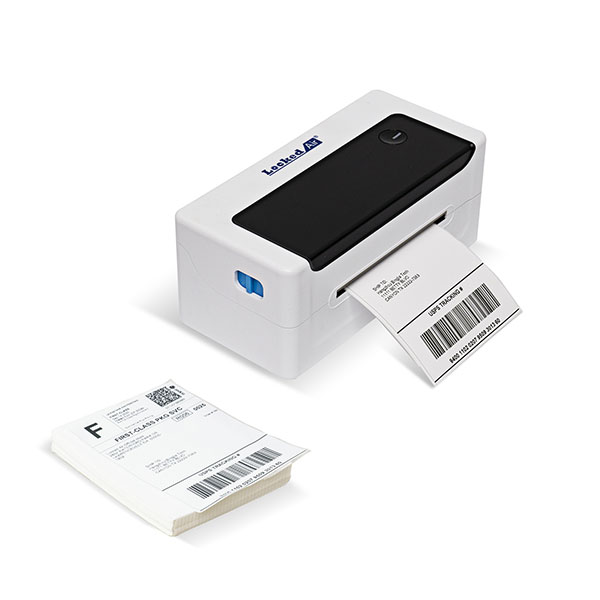
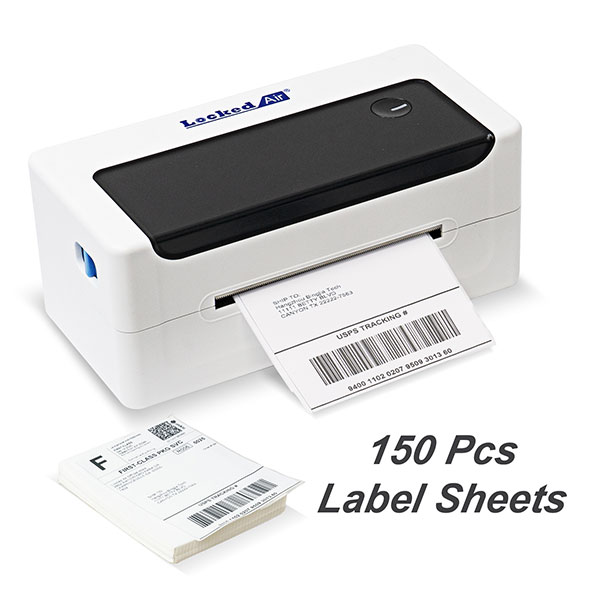
2. Senza porta etichette o vassoio nella confezione. Puoi mettere solo fogli di etichette piegati a ventaglio sul tavolo.
3. Questa stampante termica per etichette 4x6 compatibile con MAC OS 10.9, MAC OS 10.15, MAC OS 11, MAC OS XP, Linux(ubuntu), Windows 03,Windows 7,Windows 8, windows 10.
Specifica:
| Specifiche della macchina |
Metodo di stampa | Stampante a linea termica |
Metodo di caricamento della carta | Caricamento della carta facile/alimentazione automatica della carta |
Velocità di stampa | Rilevamento della velocità effettiva: 127.38 mm/s |
Larghezza della carta da stampa | 104mm |
Risoluzione efficace | 203 dpi (300 dpi opzionale) |
Tipo di carta | Carta continua, carta per etichette, carta per etichette nera |
Spessore della carta da stampa | 0.06-0.18mm |
Larghezza di stampa efficace | Min 38mm Max 112mm |
Dimensione del carattere | Carattere ASCII A: 12x24 ASCII Carattere B: 9x17 carattere cinese 24x24 |
Tipo di interfaccia | USB |
Adattatore di alimentazione | DC 24V - 2.5A |
Ambiente di lavoro | Temperatura di esercizio: 0-45 °C, Umidità operativa: 20-90% |
Ambiente di stoccaggio | Temperatura di conservazione:-10 ~ 60 °C, Umidità di stoccaggio: 10-90% |
Risoluzione dei problemi
La tabella sotto mostra problemi e soluzioni comuni per gli operatori.
Se hai seguito i semplici metodi di risoluzione dei problemi ma la stampante non funziona ancora bene, contatta il servizio clienti del tuo rivenditore per l'assistenza.
| Risoluzione dei problemi |
L'indicatore di alimentazione è spento | A. La spina ca e la spina di alimentazione non sono collegati correttamente alla presa della stampante. B. L'interruttore di alimentazione della stampante non è acceso. | A. Controlla la connessione di alimentazione e conferma che la spina ca e la spina di alimentazione sono collegate automaticamente alla presa della stampante. B. Accendi la stampante. |
Non in grado di stampare | A. Il cavo di comunicazione non è collegato correttamente alla stampante e all'host del PC. B. Errore di impostazione dell'interfaccia di comunicazione. C. Print errore di stato. | A. Collegare il cavo di comunicazione. |
Contenuto di stampa non completo | A. La carta non è centrata. B. L'impostazione delle dimensioni dell'etichetta non è corretta. | A. Regolare la posizione della carta. B. Impostare la dimensione dell'etichetta corretta. |
Posizionamento non corretto | L'apprendimento dell'etichetta a. B. Il fotoaccoppiatore per il rilevamento dell'etichetta della cucitura è offset. C. Modalità errore selezionata. | A. Label learning viene utilizzato. B. Apri il coperchio per controllare se il componente di rilevamento dell'etichetta di cucitura è offset. Per la carta per etichette nera, sposta il componente di rilevamento dell'etichetta della cucitura in base alla posizione dell'etichetta nera in modo che il fotoaccoppiatore di rilevamento sia in grado di rilevare l'etichetta nera. Carta per etichette/papen continuo il fotoaccoppiatore detedion deve essere nella gamma di carta. C. Usa lo strumento di impostazione per aprire le informazioni sulla stampante e verifica se il tipo di carta è lo stesso del caricamento della carta Nella stampante, che può essere modificata utilizzando l'impostazione tod. |
Risultato di stampa scadente | A. Errore di caricamento della carta. B. Print densrty/errore di impostazione della velocità. C. Testina di stampa/rullo in gomma ha accumulo di polvere o adesivo. D. La testina di stampa è danneggiata. | A. Ricarica la carta. C. Pulisci la testina di stampa/rullo in gomma. (Fare riferimento alla testina di stampa per la pulizia da 8.1 ""/82 'sensore di pulizia * stampa per la pulizia da 78.3" Rubber RoHeT del manuale.) D. Usa lo strumento di impostazione a d * ct bad point Pezzo di testa. Se la testina di stampa è danneggiata, si prega di contattare il servizio clienti del rivenditore riparazioni ftx. |
| Soluzione per la causa del problema dei guasti |
Problema di guasto | C. | C. Solution |
L'indicatore di alimentazione è spento | D. La spina ca e la spina di alimentazione non sono collegati correttamente alla presa della stampante. E. L'interruttore di alimentazione della stampante non è acceso. | D. Controlla la connessione di alimentazione e conferma che la spina ca e la spina di alimentazione sono collegate automaticamente alla presa della stampante. E. Accendi la stampante. |
Non in grado di stampare | D. Il cavo di comunicazione non è collegato correttamente alla stampante e all'host del PC. E. Errore di impostazione dell'interfaccia di comunicazione. F. Print errore di stato. | A. Collegare il cavo di comunicazione. |
Contenuto di stampa non completo | C. La carta non è centrata. L'impostazione delle dimensioni dell'etichetta d non è corretta. | C. Regolare la posizione della carta. D. Impostare la dimensione dell'etichetta corretta. |
Posizionamento non corretto | L'apprendimento dell'etichetta d non viene utilizzato. Il fotoaccoppiatore per il rilevamento dell'etichetta e. Seam è offset. F. Modalità errore selezionata. | D. Label learning viene utilizzato. E. Apri il coperchio per controllare se il componente di rilevamento dell'etichetta di cucitura è offset. Per la carta per etichette nera, sposta il componente di rilevamento dell'etichetta della cucitura in base alla posizione dell'etichetta nera in modo che il fotoaccoppiatore di rilevamento sia in grado di rilevare l'etichetta nera. Carta per etichette/papen continuo il fotoaccoppiatore detedion deve essere nella gamma di carta. F. Usa lo strumento di impostazione per aprire le informazioni sulla stampante e verifica se il tipo di carta è lo stesso del caricamento della carta Nella stampante, che può essere modificata utilizzando l'impostazione tod. |
Clicca per vedere le specifiche dettagliate
 中文
中文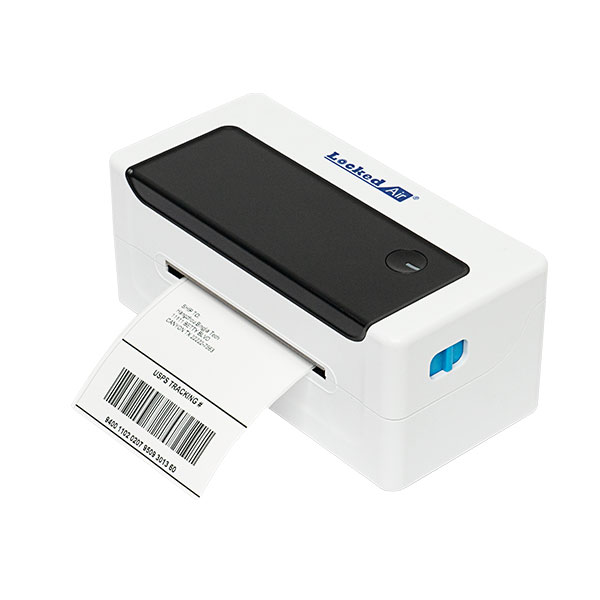

 Mar 22,2024